Shaker Cabinets
Premium Quality | Classic Design | Affordable Prices
Upgrade your kitchen with the timeless elegance of Shaker Cabinets. Combining simplicity and durability, these cabinets are designed to enhance any kitchen, from modern to traditional styles.
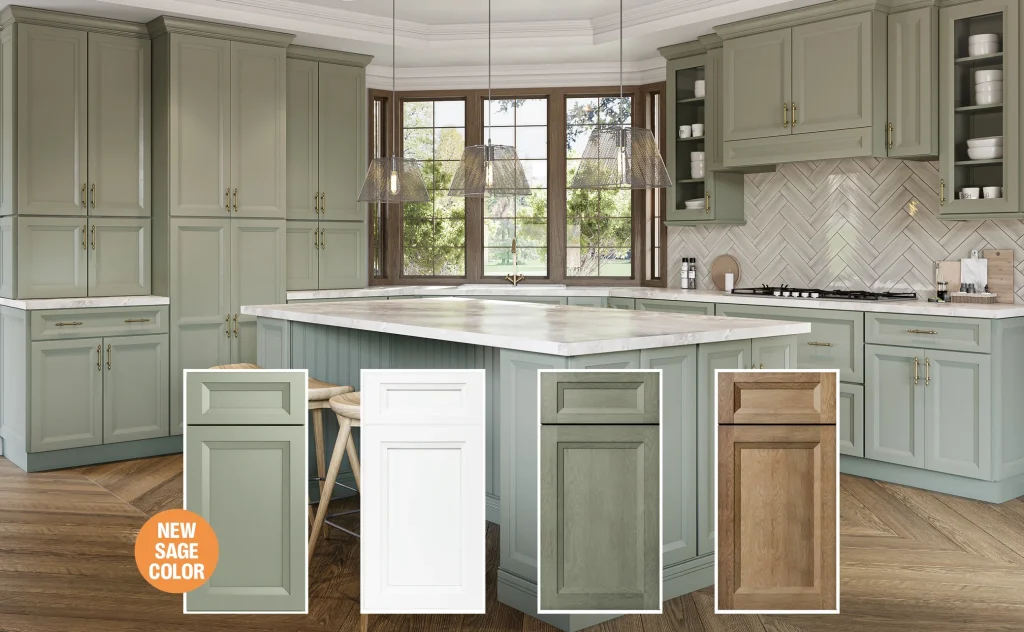
Transform Your Kitchen with Elegant Shaker Cabinets
Shaker Cabinets are the perfect choice for homeowners and contractors looking for a balance of style, functionality, and affordability. With clean lines and a classic design, they complement any decor and stand the test of time.
Shaker cabinets are a staple of home design, known for their clean lines, functional simplicity, and timeless appeal. Whether you’re remodeling your kitchen, upgrading a bathroom, or seeking versatile storage solutions, Shaker cabinets offer a blend of classic and contemporary design that suits various spaces and preferences.
Ready to Assemble Shaker Kitchen Cabinets
Packs flat, ready to assemble.
Save 40%-60%!
Assembled Shaker Kitchen Cabinets
Cabinets ship pre-assembled, saving time.
Save 40%-60%!
Shaker Style Cabinets
10′ x 10′ Kitchens starting at $1350
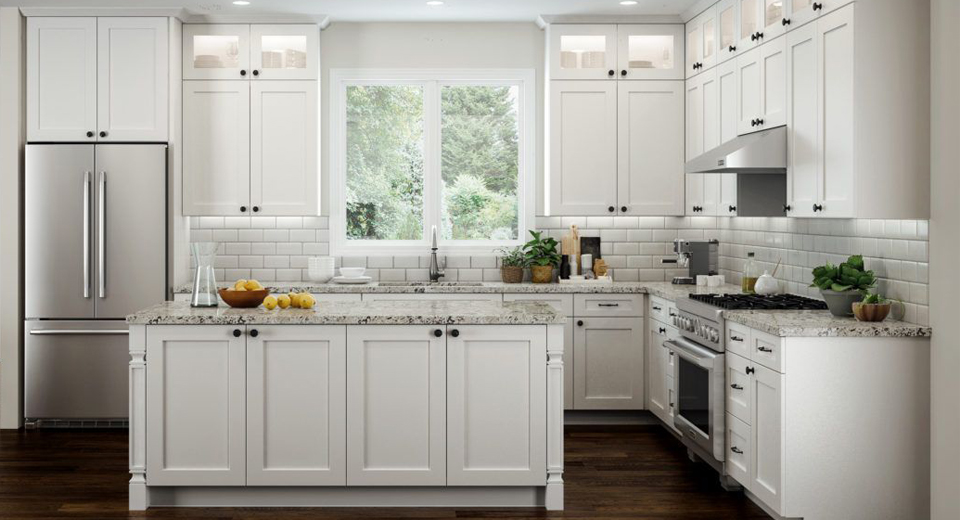
Upton Brown Shaker
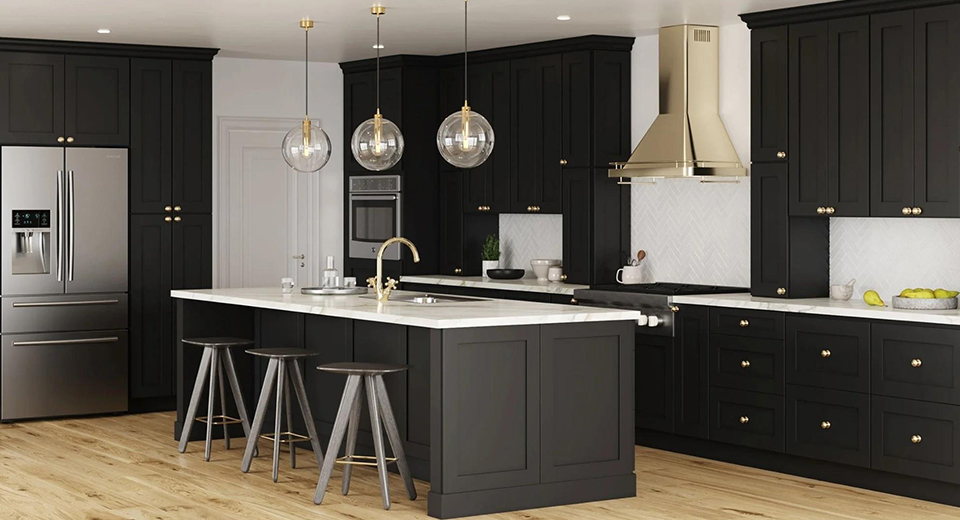
Oceana Blue Shaker
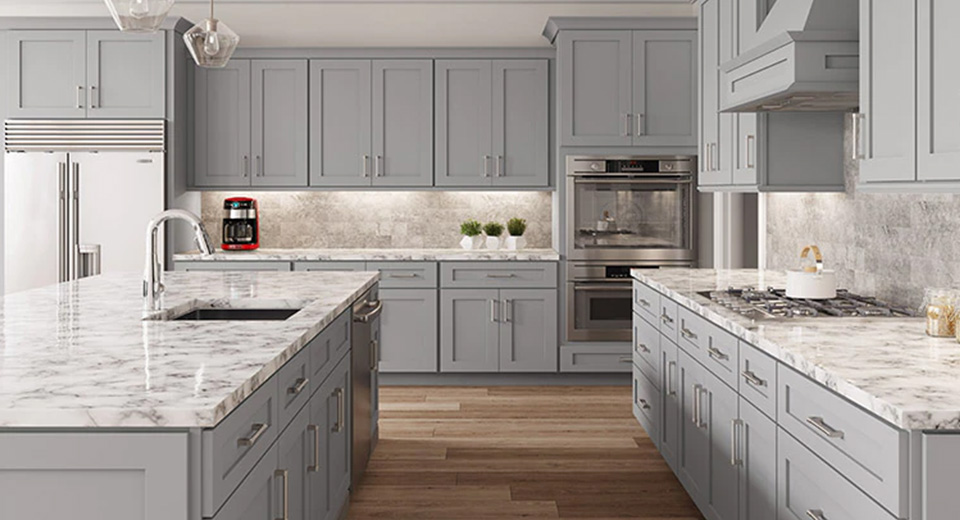
Bay Shaker White
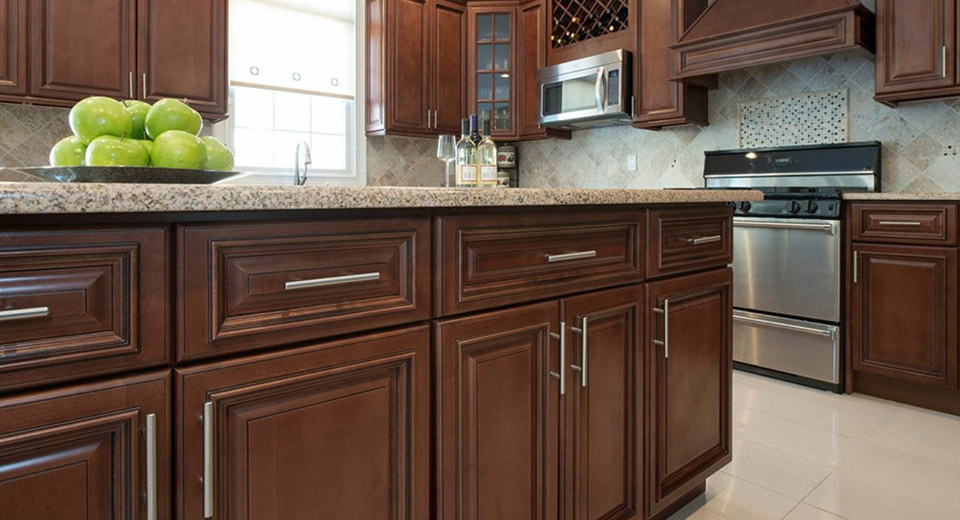
Shaker Antique White

Double Shaker White

Unfinished Shaker

Double Shaker Sterling Grey

Double Shaker Smoker Grey
HOW TO ORDER YOUR KITCHEN

Work 1-on-1 with a pro kitchen designer

Once you’re satisfied with your final kitchen design

Most RTA orders ship out in 2-5 business days; pre-assembled orders ship out in 2 weeks.
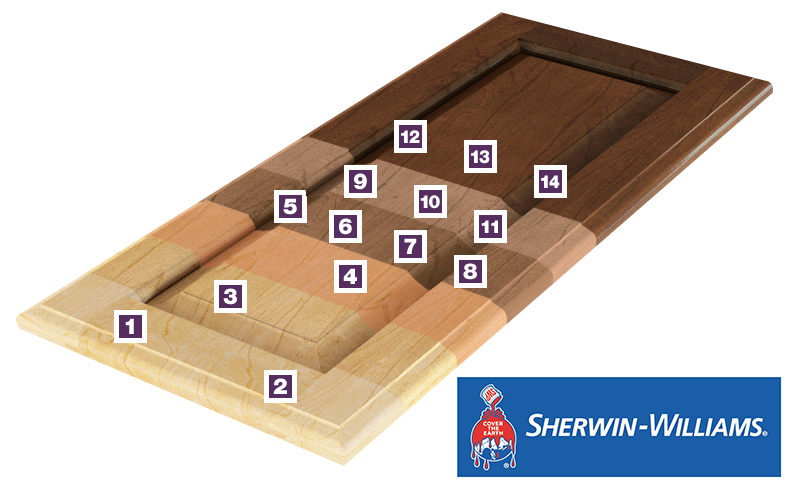
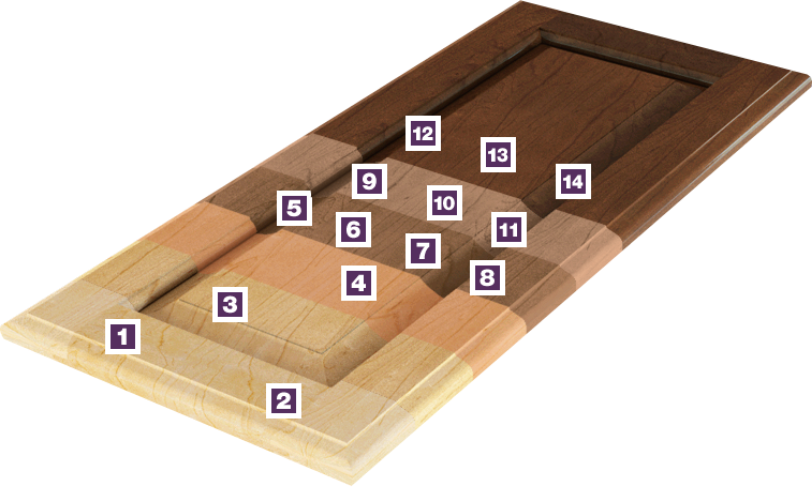
SHERWIN-WILLIAMS 14-Step Finishing Process
All of our wood doors and drawer fronts receive SHERWIN-WILLIAMS’s 14-step finishing process, resulting in one of the finest finishes in the industry. Our skilled craftsmen make each piece of shaker style kitchen cabinets to your exact specifications, from the initial sanding to the final finish application.
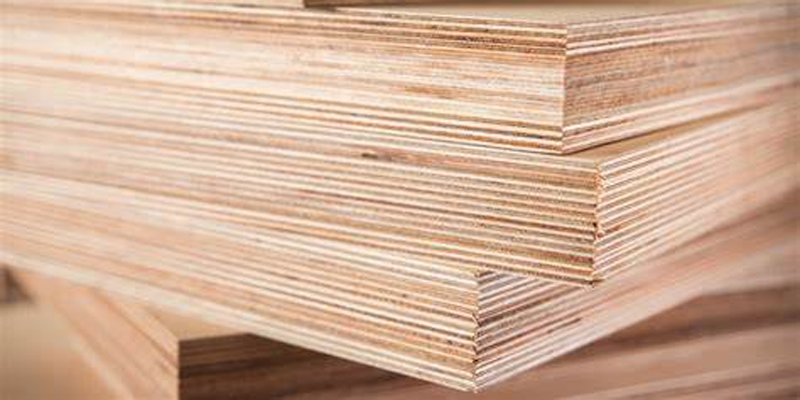
All-plywood construction
Shaker style cabinet boxes are made of “Grade-A” plywood. Full plywood sides and backs make the strongest cabinets. They maintain their square shape during shipping and installation, can support heavy countertops, and are resistant to moisture damage.
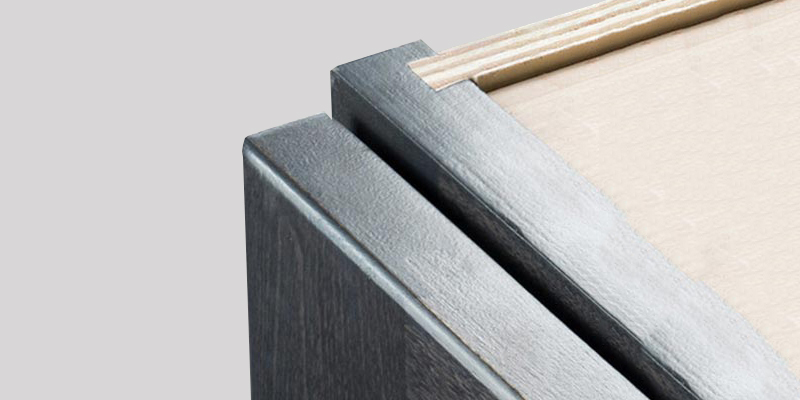
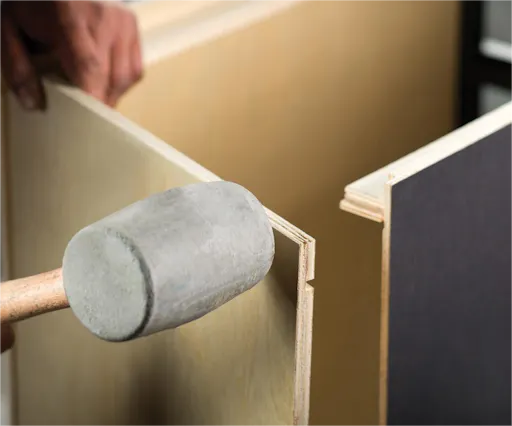
Dovetail Construction
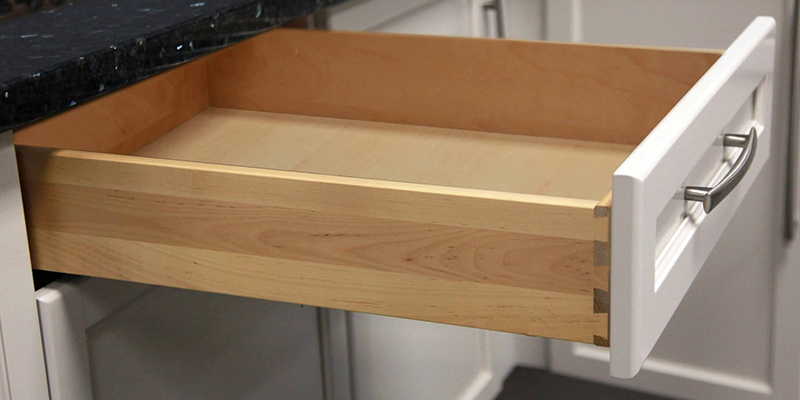
All of our shaker kitchen cabinets use a special way of joining pieces called dovetail construction. This means that matching dovetail-shaped cuts perfectly fit the plywood sides of the cabinets with the solid wood front parts. This strong and durable method makes sure that the cabinets are secure, strong, and last a long time.
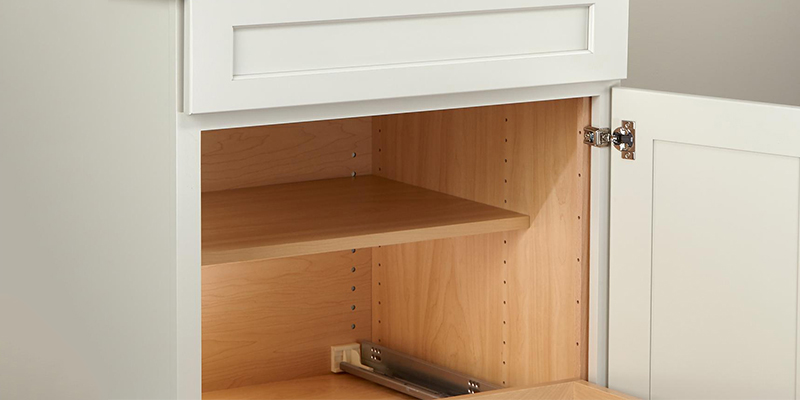
Anti-Warp Structures
All shaker style for cabinets are constructed to avoid warping, guaranteeing that they will resist elemental pressure. Every single component is carefully manufactured to ensure durability. Each cabinet we make is built to a high quality, providing long-term reliability.
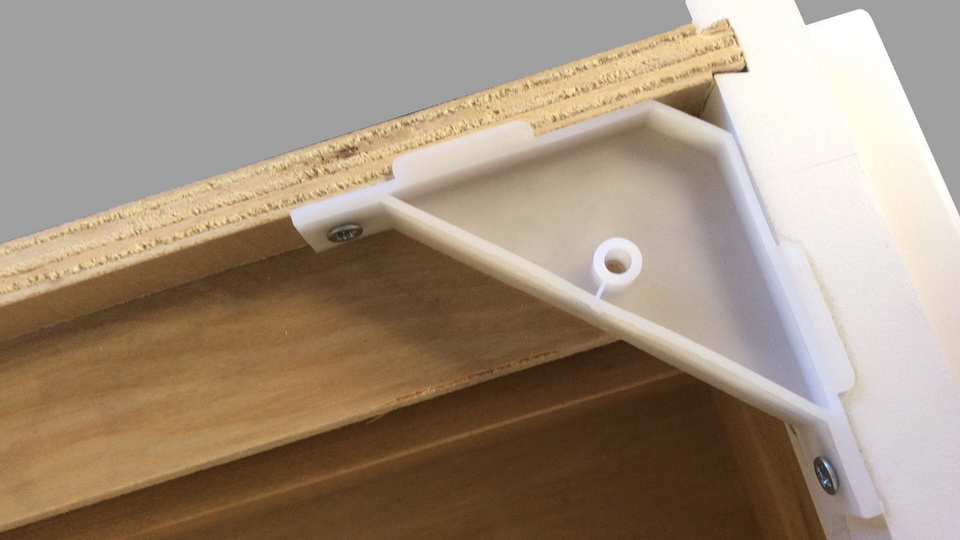
Corner Blocks
We line our shaker style kitchen cabinet lines with plastic corner blocks to maintain the purity of cohesive construction, ensuring a unified and organic design build.
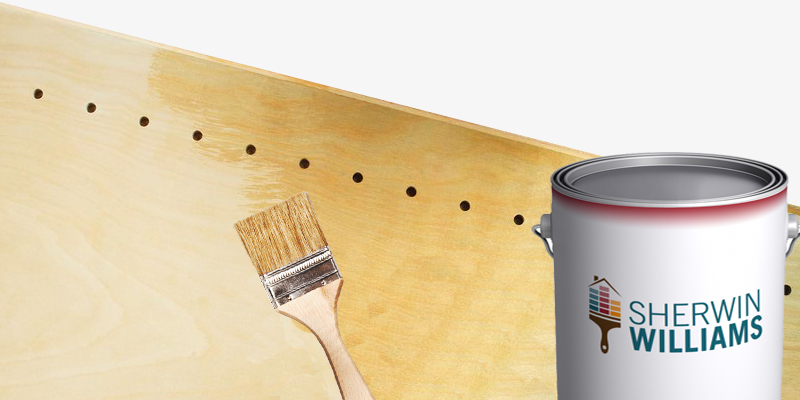
Treated & Finished Shaker Cabinet Interiors
Another important feature are the treated and finished interiors, which make a strong statement about quality and attention to detail. Our top treatment procedures result in a refined and durable design that is free of bubbling, peeling, and chipping, unlike manufacturing with an applied lining.
Solid Back Builds
We construct the back of a shaker cabinet from a single piece of solid half-inch plywood for superior structural longevity. We construct our cabinet backs from a strong, single piece of plywood to ensure durable strength and dimensional stability.
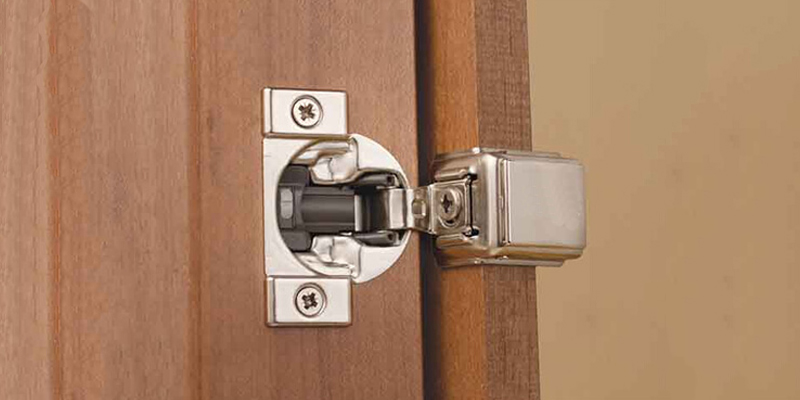
Soft-Closing Hinges
Our shaker cabinets use compact hinges with a built-in soft-close mechanism, providing a gentle and smooth cabinet function.
Full-Extension Soft Closing Drawer Glides
The smooth full-extension soft-closing technology glides ensure enhanced movement, maximizing a cabinet’s storage capacity and precisely using space while also preventing damage and wear.
Get a Free Quote Today
818-835-5888

SHERWIN-WILLIAMS 14-Step Finishing Process
We use only the best quality wood stains and finishes from SHERWIN WILLIAMS Industrial Wood Division and their partners.

STEP 01
Shaker Cabinets selects quality wood, which skilled craftsman sand to a smooth finish.
STEP 02
After sanding,all surfaces are vacuumed to eliminate dust particles.

STEP 03
Craftsman hand-apply distressing,vintage and burnished techniques to selected finishes.
STEP 04
Equalizer stains are applied to balance the base color of the wood.
STEP 05
Toner is applied which establishes consistent color uniformity.
STEP 06
A deep penetrating stain is(hand-applied/hand-sprayed/applied)to reveal the wood grain.

STEP 07
All stained surfaces are evenly hand-rubbed and wiped clean of excess stain.
STEP 08
After slowly air drying,highlights,glaze,glaze details,burnishing stain,and vintage patina are hand-applied to selected finishes.
STEP 09
Specially formulated wood sealer is applied,penetrating all exposed wood surfaces for uniform protection.
STEP 10
Sealed product is placed in high-temperature oven to ensure a thorough cure.
STEP 11
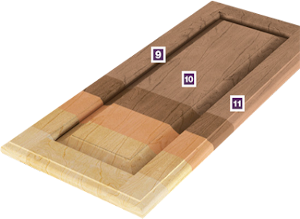
All surfaces are hand-sanded again,providing a smooth,consistent surface to accept topcoat.
STEP 12
Environmentally safe topcoat is applied to maximize resistance to scuffing,dents,moisture,UV fade and household chemicals or agents.
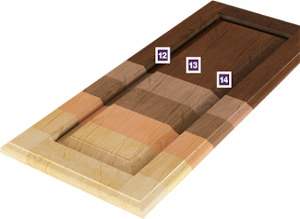
STEP 13
Top-coated pieces are slow-cured in a 150-degree oven,creating a smooth,baked on surface.
STEP 14
Each cabinet is inspected and hand-polished,assuring quality and durability.
Shaker Cabinets
We specialize in providing premium shaker cabinets that combine timeless style with exceptional quality. Designed for durability and elegance, our cabinets are perfect for modern and classic kitchen designs alike. As a trusted supplier, we offer wholesale prices that make high-quality cabinetry affordable for homeowners, contractors, and designers. Whether you’re upgrading your kitchen or working on a large-scale project, our shaker cabinets deliver unmatched value and craftsmanship.
What are Shaker cabinets?
Shaker Cabinets are known for their timeless, minimalist design featuring a five-piece door with a recessed center panel. They originated from the Shaker furniture style, which emphasizes simplicity, utility, and craftsmanship. These cabinets suit both modern and traditional kitchen designs.
Features of Shaker-Style Cabinets
Minimalist Design: Straight lines and unadorned surfaces.
Versatile Aesthetic: Complements both traditional and modern spaces.
Durable Materials: Typically crafted from hardwoods like maple, cherry, or oak.
Neutral Finishes: Often painted in white, gray, or natural wood tones.
Benefits of Choosing Shaker Cabinets
- Timeless Appeal: Shaker cabinets’ simple design ensures they never go out of style.
- Easy to Customize: Available in a variety of finishes, colors, and hardware options.
- Durability: Built with quality materials to last for years.
- Affordable Options: Suitable for different budgets without compromising on style.
Shaker Cabinets in Kitchen Design Trends
Shaker cabinets adapt seamlessly to changing design trends. Here are some popular ways they’re used today:
Modern Kitchens: Pair with sleek hardware and bold backsplashes for a contemporary look.
Farmhouse Style: Combine with rustic wood countertops and vintage handles.
Two-Tone Kitchens: Use contrasting colors, such as white upper cabinets and navy lower cabinets.
Minimalist Spaces: Opt for flat, neutral colors and handle-less designs.
Materials and Finishes
Shaker cabinets are typically made from durable hardwoods, but budget-friendly options like medium-density fiberboard (MDF) are also available. Popular finishes include:
Painted Finishes: White, gray, or bold colors for a modern touch.
Stained Finishes: Highlighting the natural grain of the wood.
Matte or Satin Finishes: Providing a clean and subtle look.
Shaker Cabinets vs. Other Cabinet Styles
| Feature | Shaker Cabinets | Raised-Panel Cabinets | Flat-Panel Cabinets |
|---|---|---|---|
| Design Simplicity | High | Moderate | High |
| Versatility | High | Moderate | High |
| Cost | Moderate | Higher | Lower |
| Popularity in Trends | Timeless | Traditional | Contemporary |
Are Shaker Cabinets durable?
Yes, Shaker Cabinets are built with high-quality materials and expert craftsmanship to ensure long-lasting durability. They are designed to withstand daily use and remain stylish for years.
What materials are used in Shaker Cabinets?
Our Shaker Cabinets are typically made from solid wood, such as maple, oak, or birch, combined with durable MDF for smooth finishes. This ensures a high-quality product that’s both sturdy and visually appealing.
What styles and colors are available?
We offer a wide variety of finishes and colors, including classic white, sleek gray, warm wood tones, and more. Whether you prefer a modern or traditional look, we have options to match your kitchen’s aesthetic.
Can Shaker Cabinets be customized?
Yes, we offer customization options to fit your specific needs. From custom sizes to unique finishes and hardware, we can help you create cabinets tailored to your space and style.
Are Shaker Cabinets affordable?
Absolutely! Shaker Cabinets provide a high-end look at an affordable price. Our competitive pricing ensures you get quality cabinets without exceeding your budget.
How do I maintain Shaker Cabinets?
Maintaining Shaker Cabinets is easy:
- Clean with a damp cloth and mild soap.
- Avoid harsh chemicals or abrasive materials that can damage the finish.
- Regularly check and tighten hardware for optimal performance.
Do you offer installation services?
While we do not provide installation services directly, we can recommend trusted contractors in your area. Our team can also guide you or your contractor through the installation process.
How quickly can I receive my cabinets?
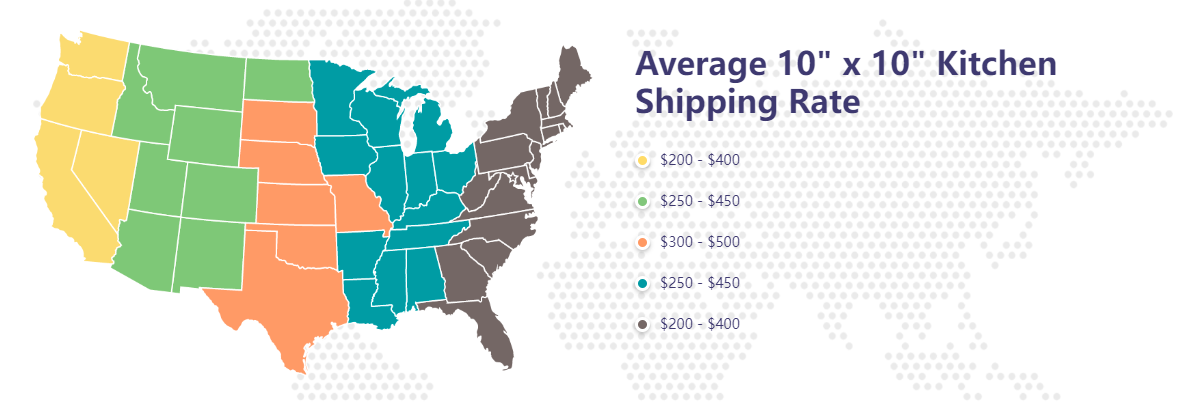
We aim for fast shipping! Delivery times depend on your location and customization requirements. Standard cabinets typically ship within 1-2 weeks, while custom orders may take slightly longer.
How do I get started?
Getting started is easy!
- Call us: +18 188 355 888
- Email us: [email protected]
- Shop online: shakercabinets.com
Our team is here to help you every step of the way, from selecting your cabinets to finalizing your purchase.
What does Grade A mean in shaker cabinet materials?
Grade A refers to the highest quality wood used in shaker cabinets. It is characterized by its smooth texture, uniform grain, and lack of defects, such as knots or imperfections. Grade A wood ensures durability, strength, and a clean, flawless finish, making it a top choice for premium shaker cabinets that will last for years while maintaining their aesthetic appeal.


